QNAP provider network attached storage devices both for personal and home users and large scale enterprises, and most other consumer NAS devices also run their QTS 5 operating system.
While QNAP offers their own photo library app
QuMagie for an additional subscription cost of $99/year, it is also possible to configure Photos+ to use your QNAP device for its cloud storage location.
The configuration steps only takes a few minutes to complete as outlined in the steps below.
The first step is to make sure your QNAP device can be securely accessed from outside your home network and the internet. QNAP provides a free service called myQNAPcloud that assigns a unique domain with SSL encryption to your device to allow such access, even when your QNAP device is on a home internet network with dynamic IP addresses that may frequenty change.
To enable this feature:
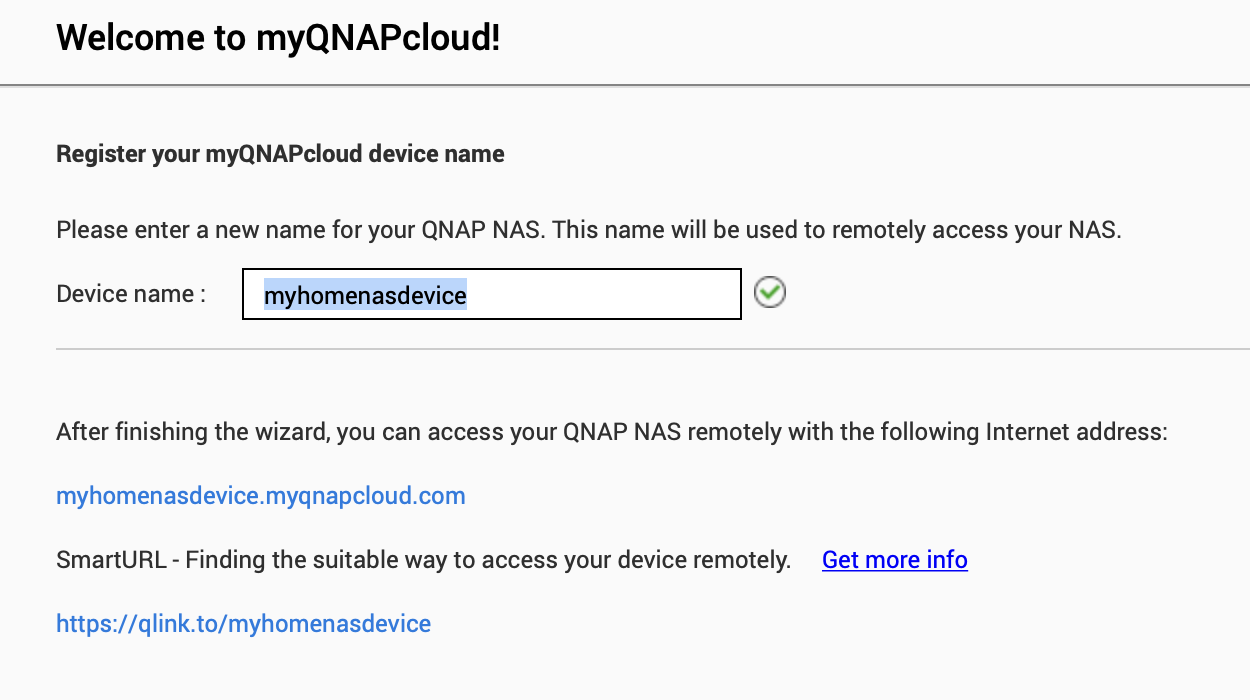
- Click on myQNAPcloud icon and click the Get Started button to configure your device.
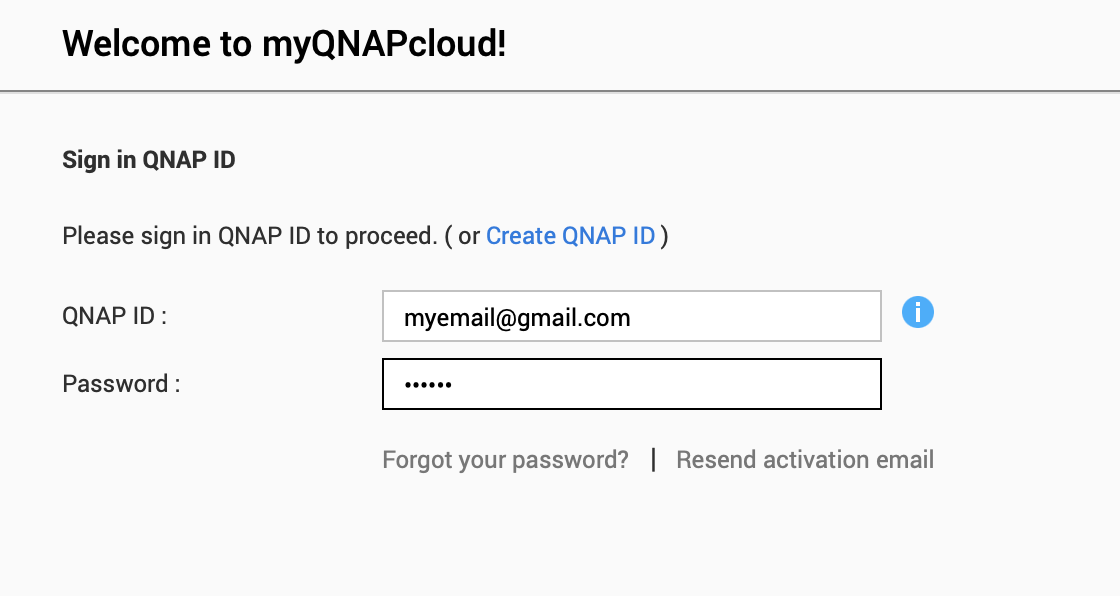
- Sign in to your existing QNAP account (or create a new account if needed) and complete the configuration steps.
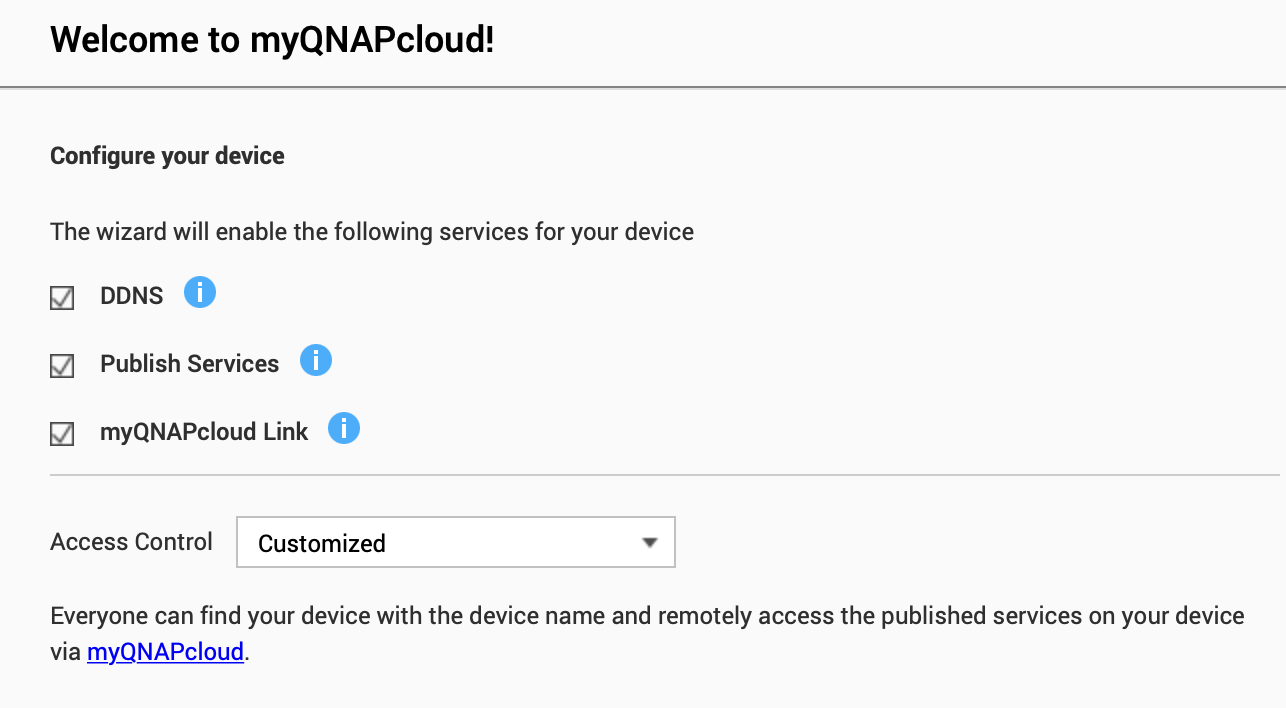
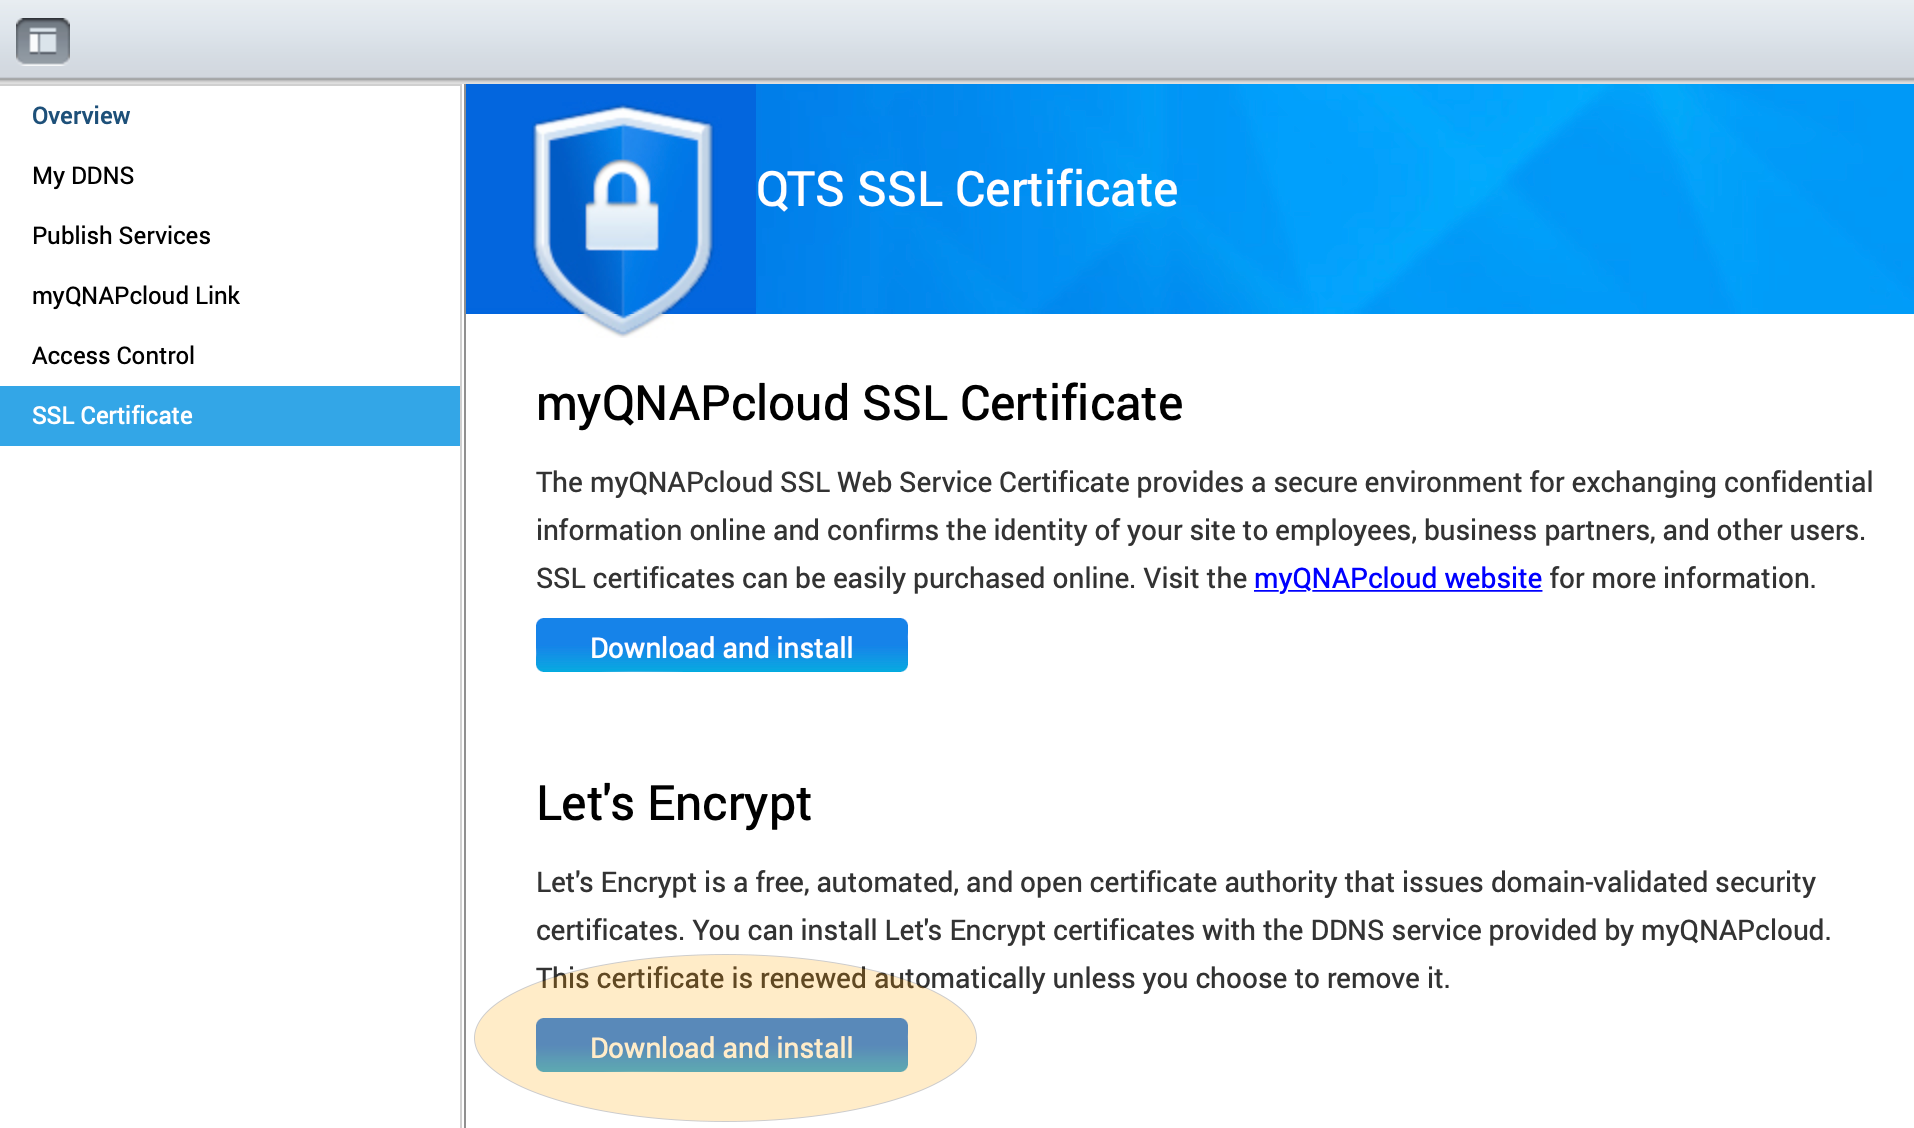
- To ensure access to your device is secure and encrypted, a free service from Let's Encrypt can be used to obtain a SSL certificate for your unique domain name. Click on SSL Certificates in the left column and then click the Let's Encrypt "Download and Install" button. Confirm your selection and allow the process to complete.
- Your device is now enabled for secure encrypted access using the unique name domain you entered. In our example, the domain is myhomenasdevice.myqnapcloud.com
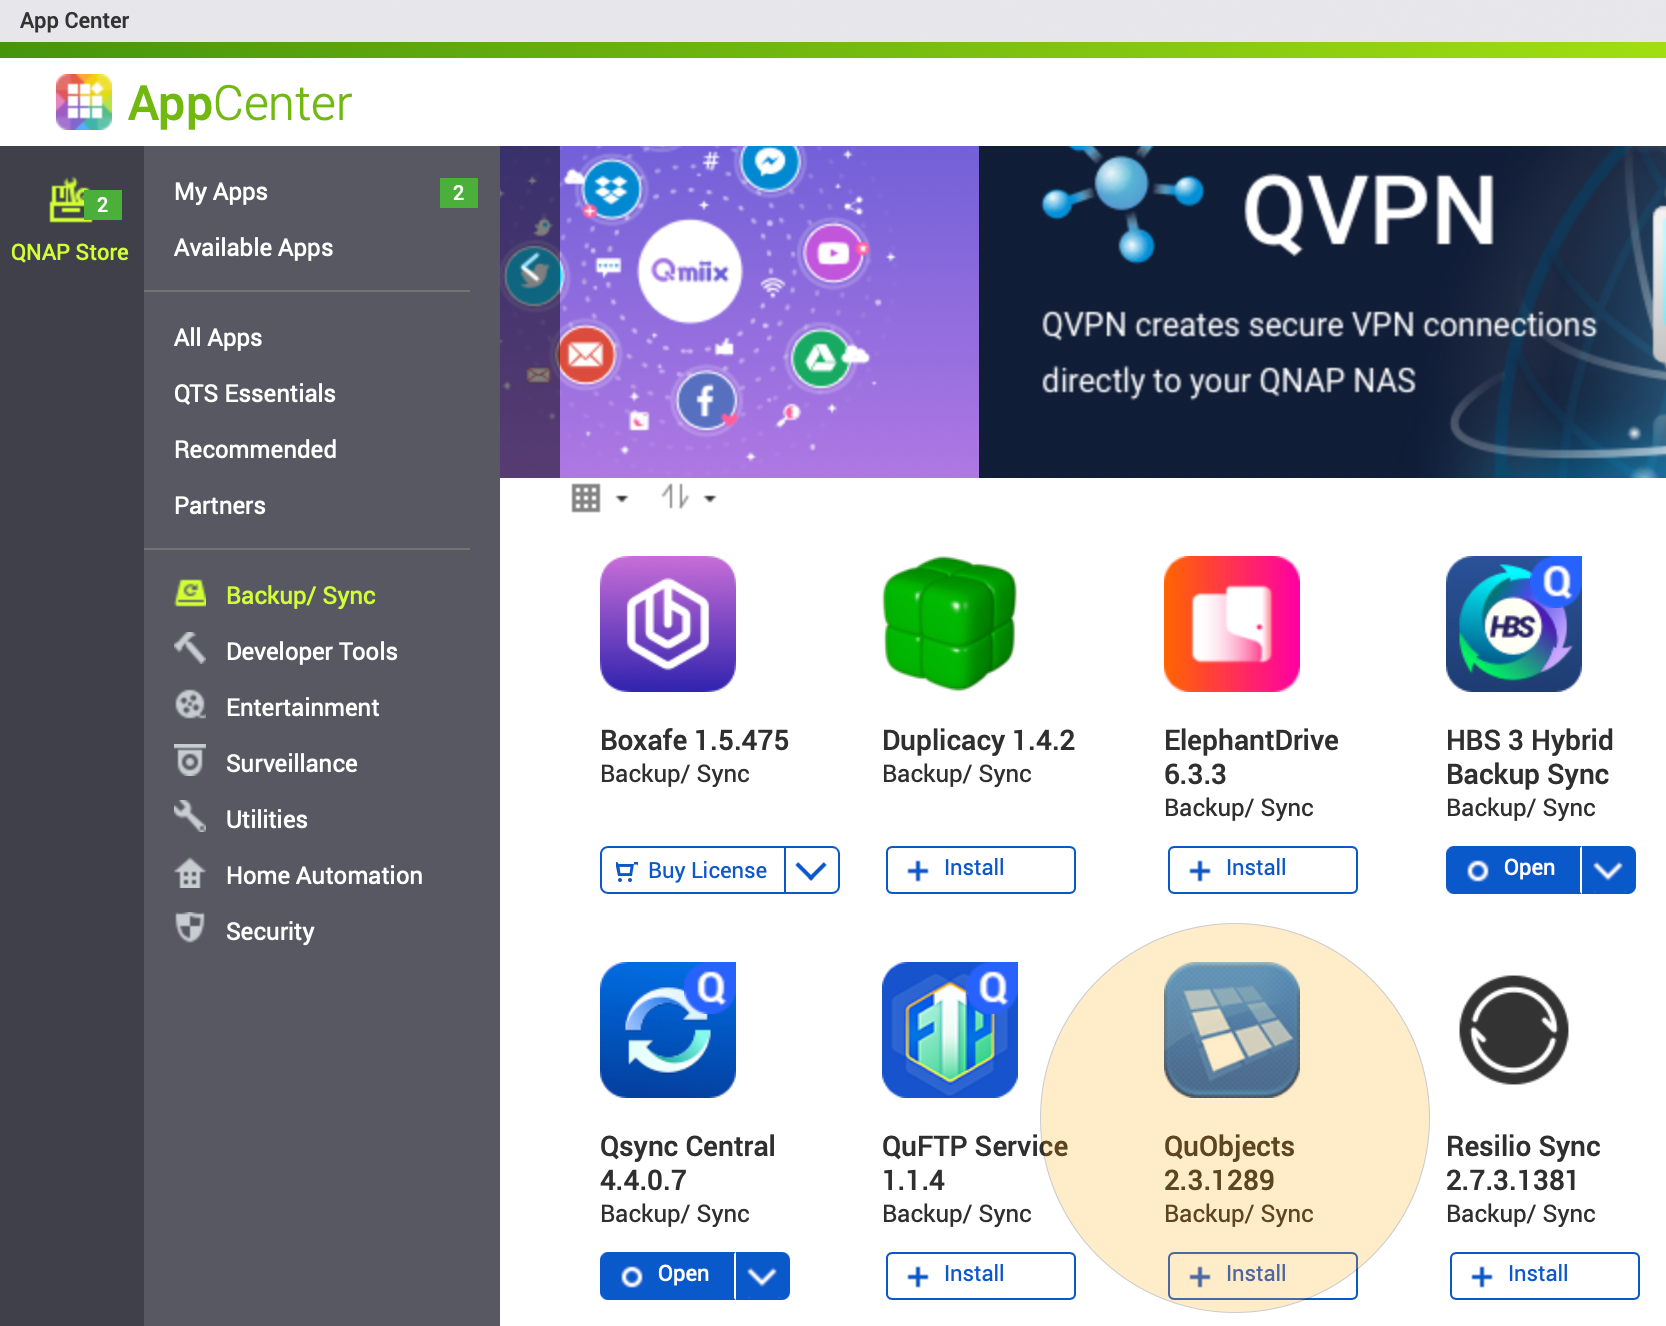
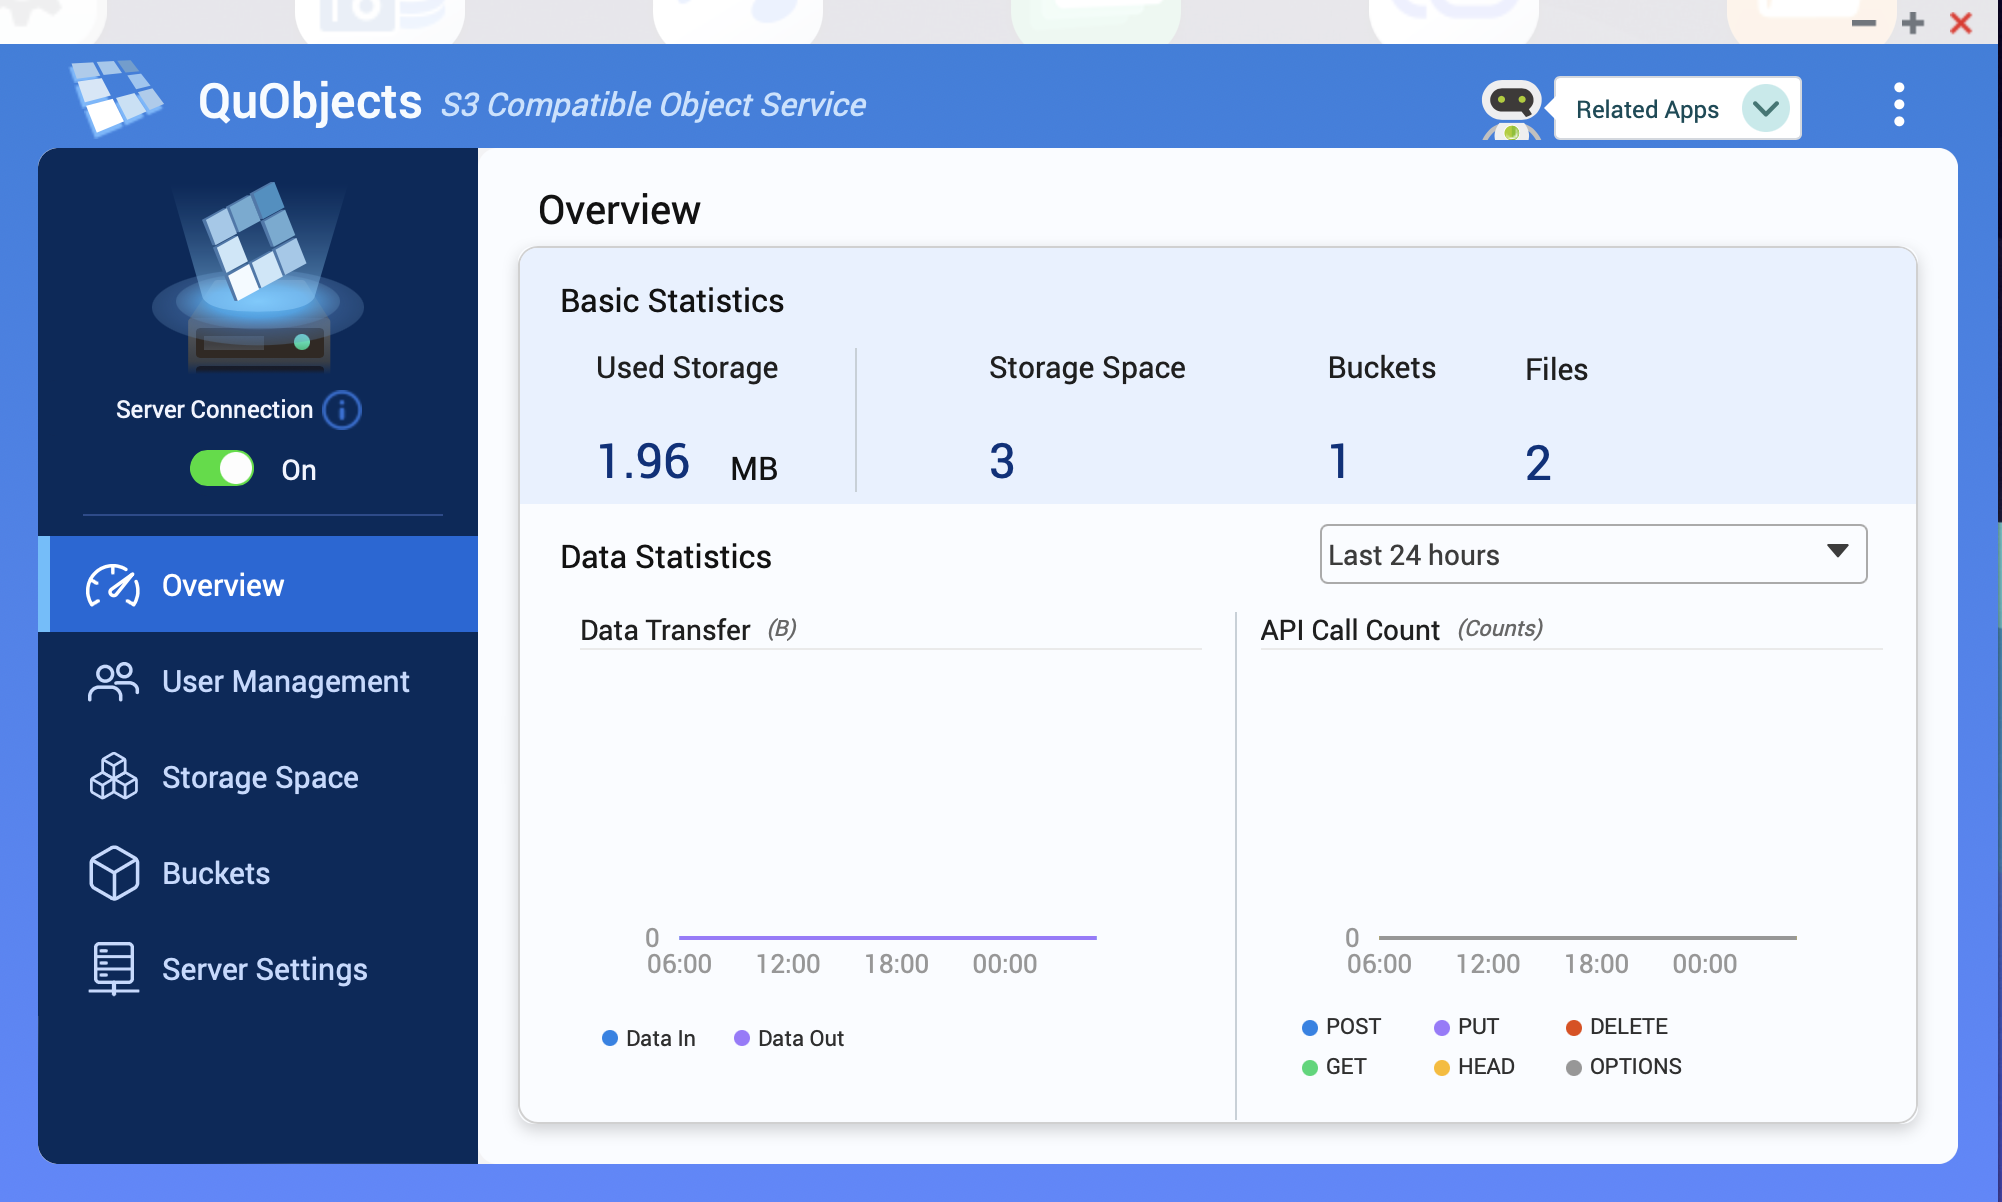
QuObjects is a free app that adds support for data access from your QNAP device using the Amazon S3-compatible object storage protocols, which is now the most widely accepted method for accessing cloud storage.
To install QuObjects:
- From the App Center, select the Backup/Sync category (or search for QuObjects), click the "+ Install" button for QuObjects to install the app and open the QuObjects app once its installed.
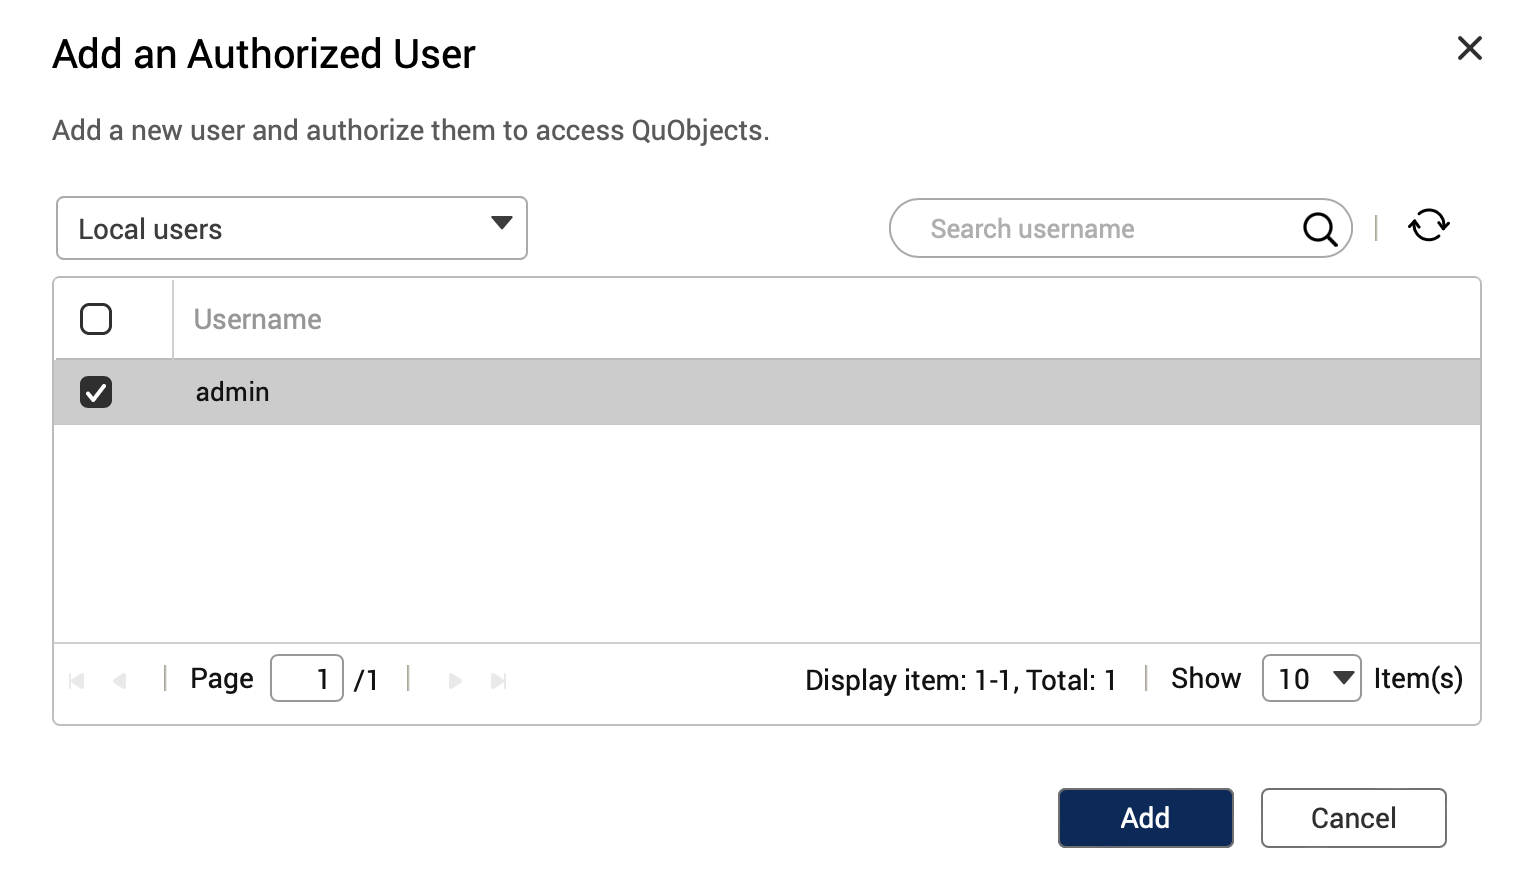
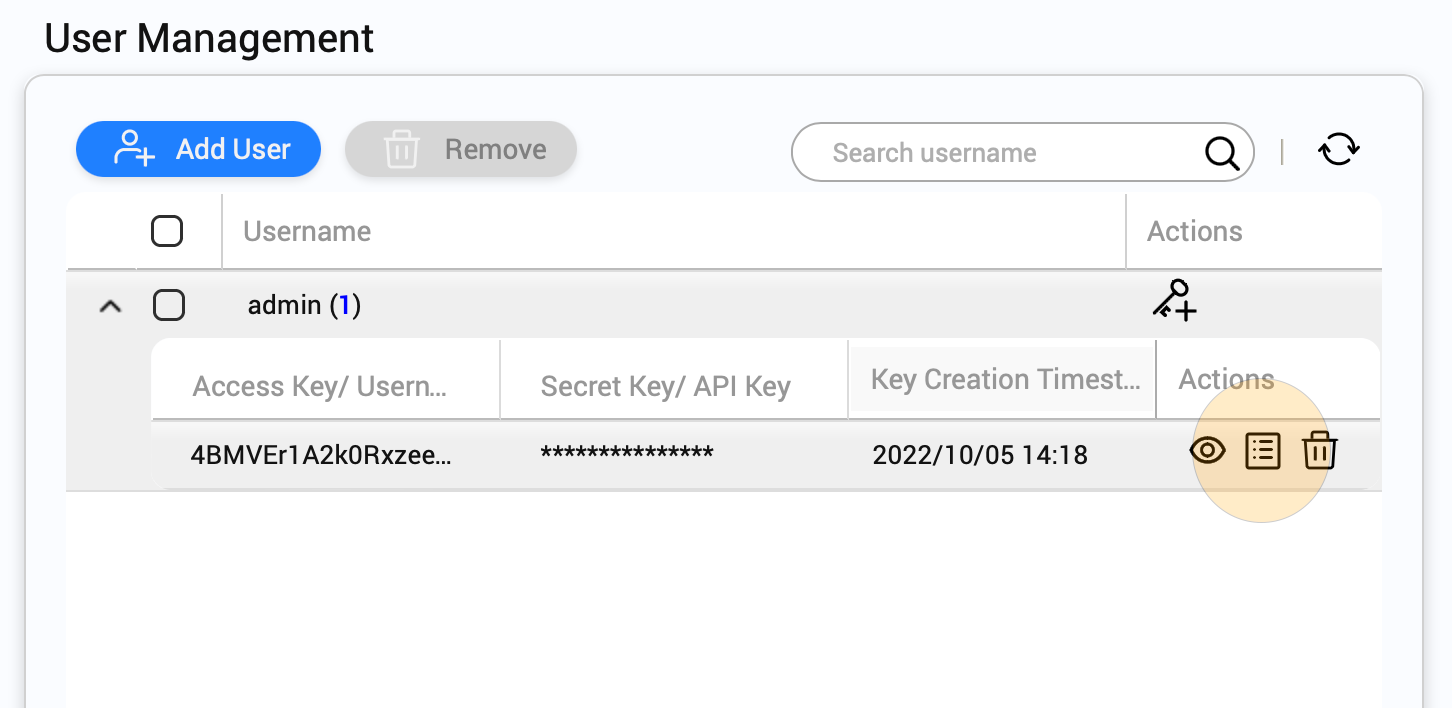
- Click User Management and then add a user with admin priviledges to grant access for this user to QuObjects.
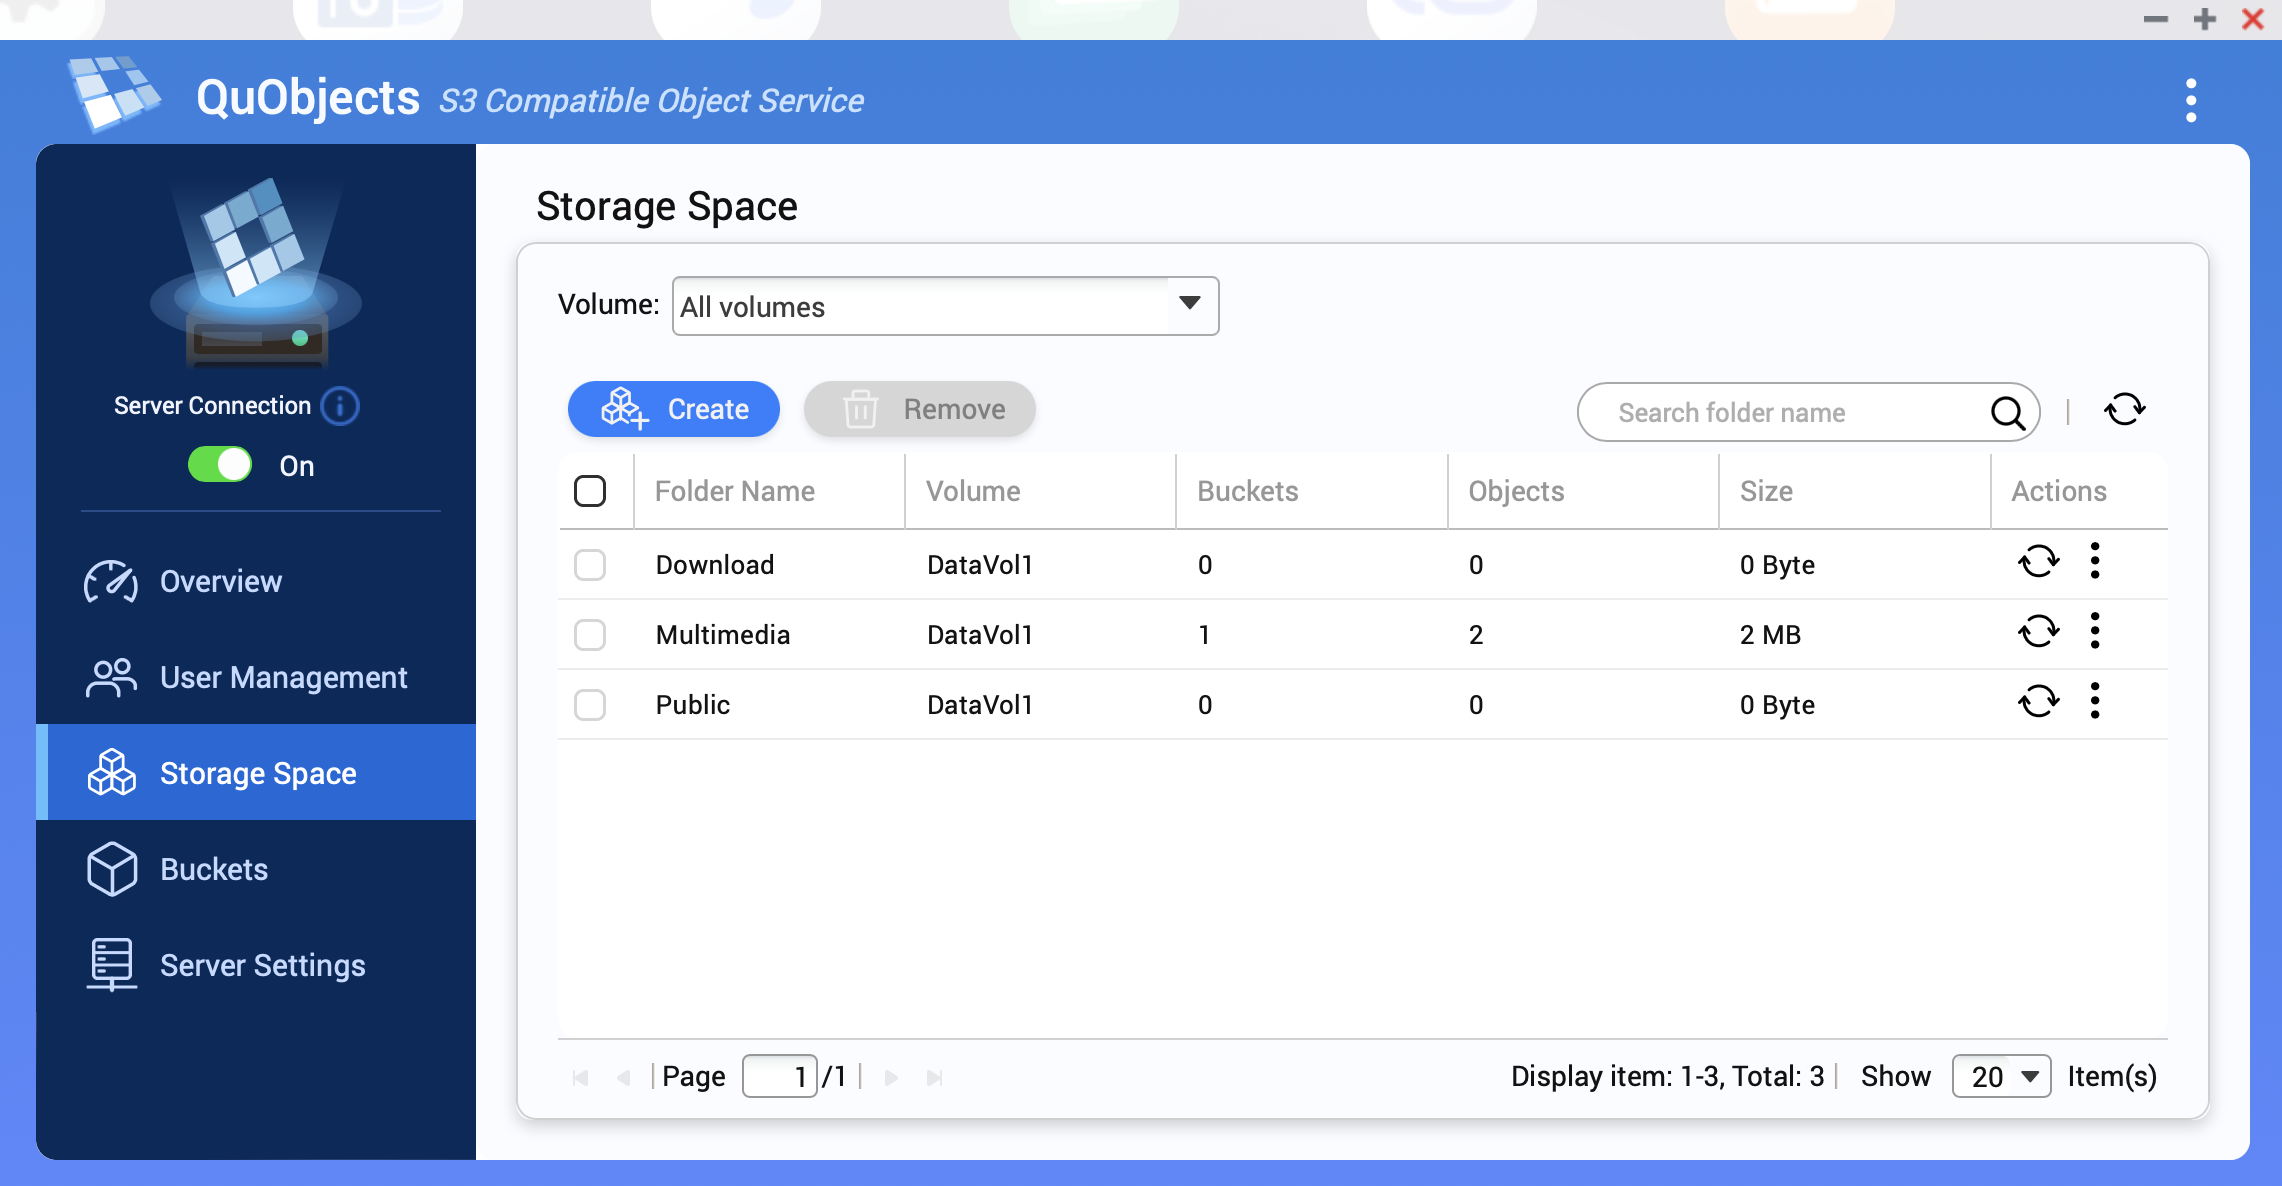
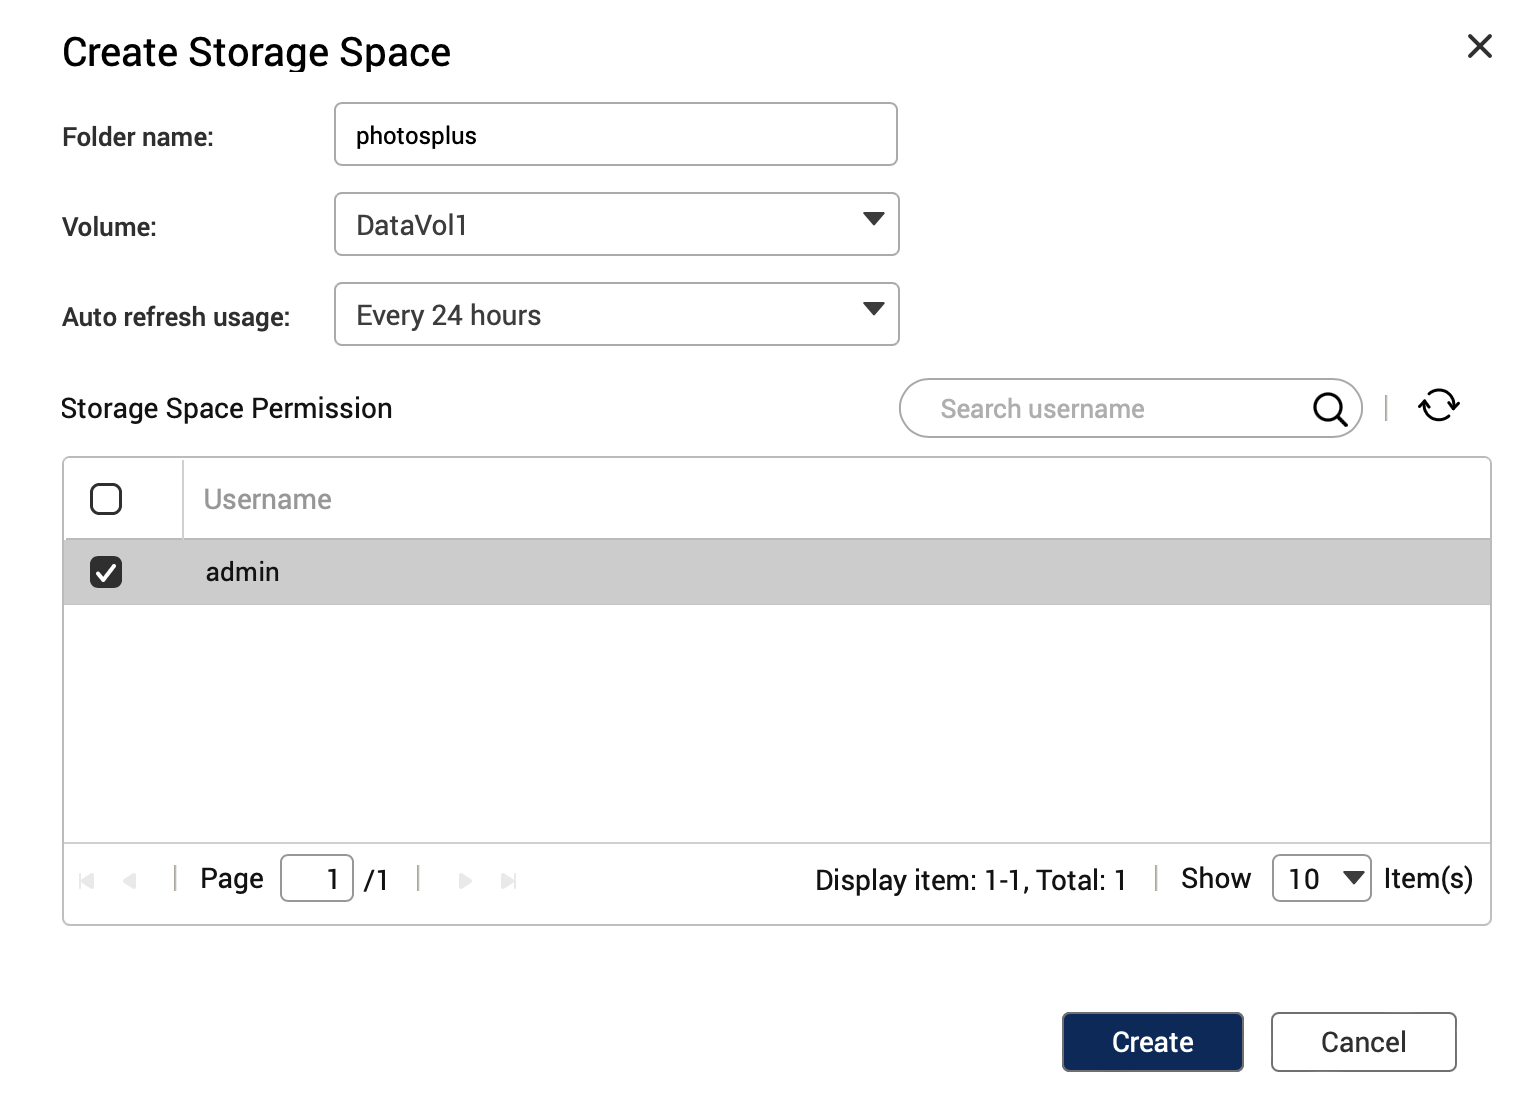
- Click Storage Space and create a new volume and give it a unique name (photosplus for example) for where QuObjects should store the files on your device. Make sure you check the box next to the user account you added in the previous step to allow this user access to the volume you are about to create.
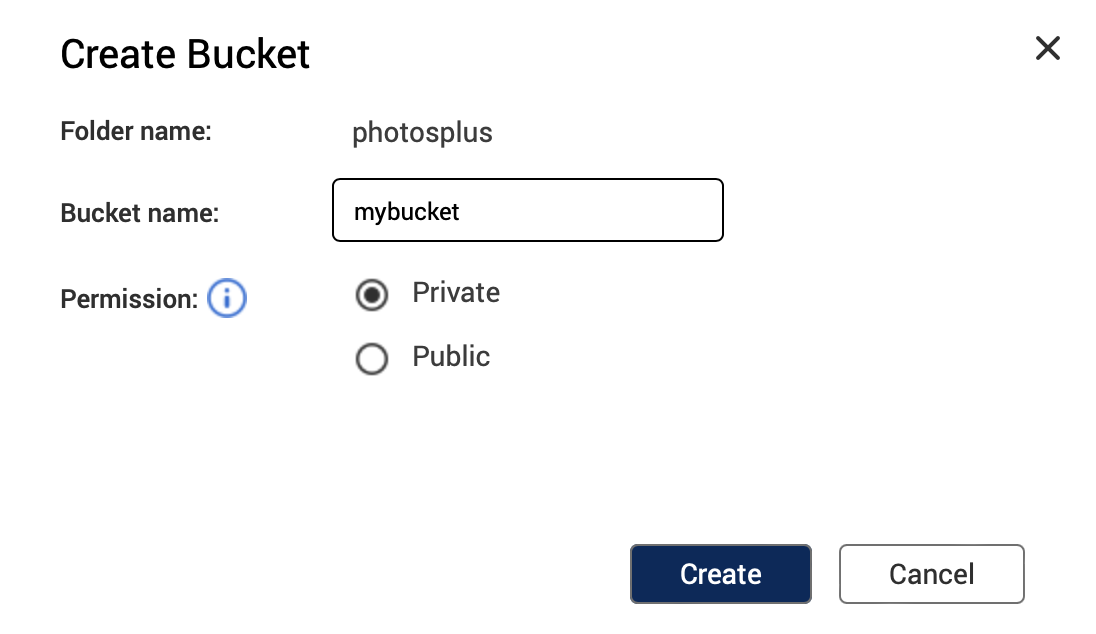
- Click Buckets and create a new bucket where the files should be stored. A bucket is simply another name for a subfolder. You can create multiple buckets if for example you would like multiple family members to each have their own separate storage space to also use with Photos+.
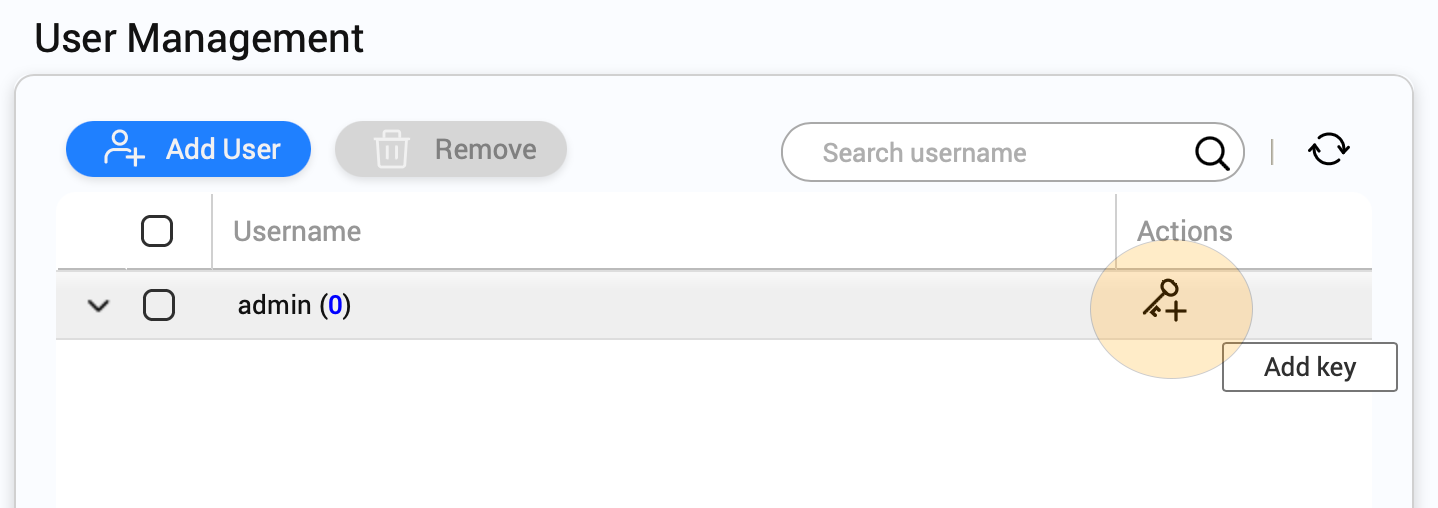
- Next go back to the User Management section and click the Add key icon to create the accesskey and secret credentials for your new S3-compatible storage cloud service powered by your QNAP device.
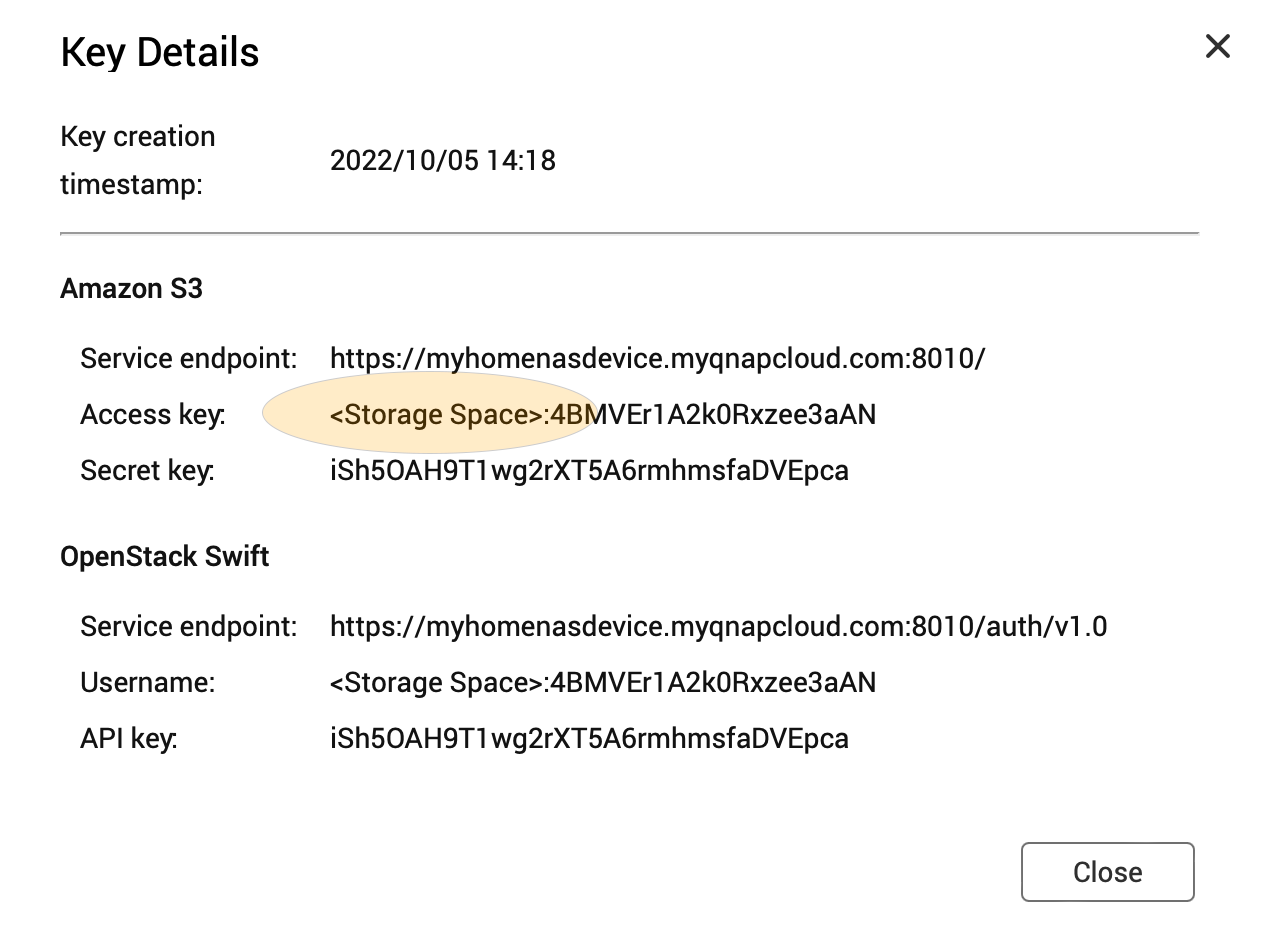
- The final step is to click the Key details icon to view your newly created credentials and copy this information to a text file on your computer. This is the information you will need to configure Photos+ to use your QNAP device as it's storage location.
- Remember to replace <Storage Space> in the Access key section with the name you provided for your storage volume. In our example, the actual Access key would be photosplus:4BMVEr1A2k0Rxzee3aAN
- Congratulations! Your device is now ready to be used as a S3-compatible cloud storage location with the Photos+ app.
With these credentials, you can now go to the Settings > Configure section of the Photos+ app and configure Photos+ to use your QNAP device for it's cloud storage location.